
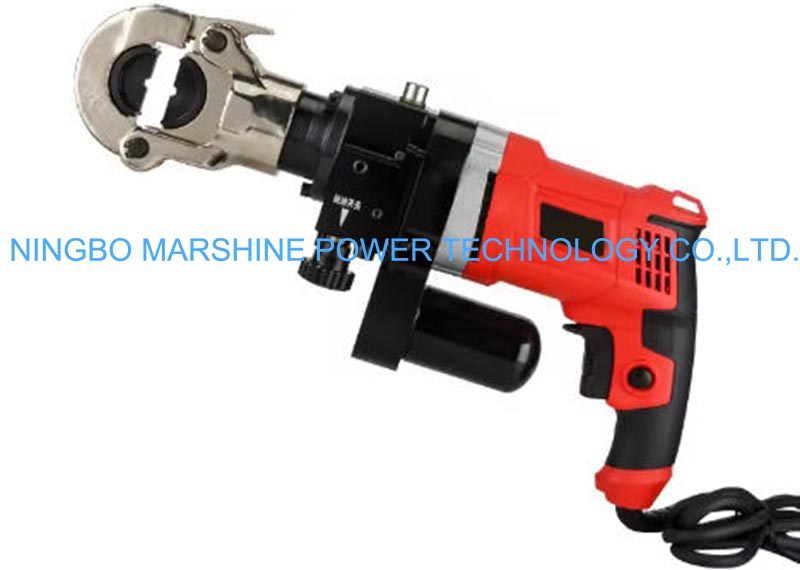
A hydraulic cable crimp tool uses fluid pressure to create strong electrical connections. Unlike simpler hand-held methods, an electric hydraulic crimping tool from MARSHINE delivers consistent, powerful force. This precision ensures highly durable connections. It even handles demanding tasks like hydraulic copper pipe crimping tool applications, guaranteeing lasting performance.
Proper crimping begins with the right equipment. You will need a reliable hydraulic cable crimp tool, like those from MARSHINE, along with the correct cable and connectors. Always have wire strippers, cable cutters, and a measuring tape ready. These basic tools ensure precise preparation before you even start crimping. Having everything organized saves time and prevents errors.
Safety is paramount when working with any power tool. Always protect yourself during hydraulic crimping operations. Wear gloves to shield hands from hydraulic fluids and sharp edges. Safety goggles or face shields are crucial; they prevent eye injuries from fluid sprays or debris. Steel-toed safety footwear protects feet from dropped tools. Additionally, protective clothing, such as long sleeves and durable work pants, reduces injury risk from accidental hose bursts or fluid contact.
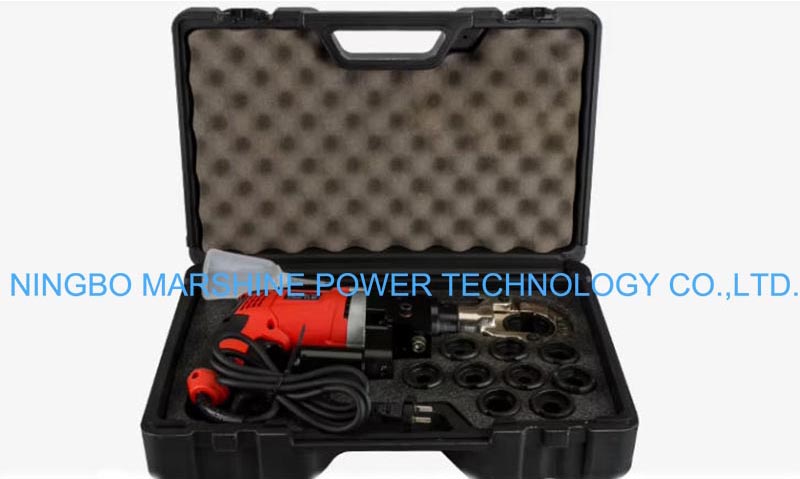
Choosing the correct cable and connector ensures a durable connection. Consider the cable's current capacity; this is vital for preventing overheating. Voltage drop also matters, as larger gauges minimize resistance. Physical considerations like size and flexibility affect installation. Environmental conditions, such as temperature or moisture, might require a larger wire gauge for safety. Copper and aluminum are common conductor materials, each with different conductivity. MARSHINE's hydraulic cable crimp tool works with various connectors, including copper and aluminum lugs, splices, and grounding clamps. It also supports different die sets, like Husky Equiv O for oval connectors or T&B 87H for high-strength copper connectors, ensuring compatibility for many applications.
Proper cable preparation sets the stage for a strong, lasting connection. First, measure the cable to the correct length. Then, you must strip the insulation without damaging the wire strands. Use a proper wire stripper, either manual or automatic, and set it to the correct wire gauge. This ensures the tool scores the insulation without cutting into the metal conductor. A firm squeeze and a slight twist usually work well. After scoring, pull the insulation straight off. Avoid bending the wire sharply, as this can cause it to snap. Always inspect the exposed conductor for cleanliness and any nicks or cut strands. If you see damage, cut that section and re-strip a fresh part of the wire. Remember, using the wrong tool, like knives or pliers, can easily damage the wire. Also, avoid exerting too much force; stripping should not require a lot of effort.
Choosing the right die is crucial for a secure crimp. First, identify the connector type you are using, such as butt connectors or ring terminals. This tells you the style of crimp and the tool you need. Next, match the wire gauge to the tool's crimp cavities. Using the wrong size can lead to a loose or over-compressed crimp. The crimping tool must also have the correct die shape, like oval, hex, or square, that matches the connector's barrel. For insulated connectors, ensure the tool is suitable for insulated terminals, often shown by color-coded dies. MARSHINE's tools offer various die sets to match different connector types and sizes. Always follow the manufacturer's recommendations for your specific hydraulic cable crimp tool.
Correct positioning prevents common crimping mistakes. Insert the stripped cable fully into the connector barrel. Make sure all wire strands are inside the barrel. Failing to do this can weaken the connection. For insulated terminals, position the crimp tool slightly behind the terminal's edge for the best security. The tool often has a labeled section for this. For non-insulated terminals, align the tool's divot with the non-gap end of the barrel. This ensures a firm and secure crimp. A common error is assuming connector size directly relates to wire gauge. Always check the stamp on the connector for the exact size. Color-coding, like red for 22-16 gauge or yellow for 12-10 gauge, is a reliable indicator for insulated connectors. Avoid under-crimping, which means not enough force, or over-crimping, which means too much pressure. Both can lead to connection failure.
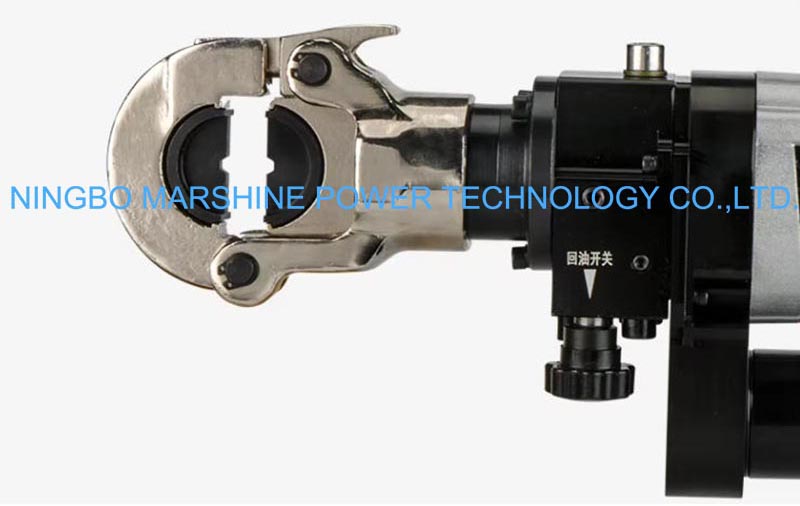
Operating the hydraulic tool requires careful steps. First, position the cable and connector accurately between the tool's dies. Next, turn the rotary valve to the 'on' position. Then, repeatedly activate the hand lever to generate hydraulic pressure. This extends the piston. Carefully bring the dies together until they lightly touch the material. Confirm the material's position one last time. Then, perform one final lever action to complete the crimp. After the crimp is complete, turn the rotary valve to the 'off' position. This allows the oil to drain into the feed tube, releasing pressure and resetting the lower die.
After crimping, a thorough inspection is essential. Look for several visual indicators of a good crimp. The wire and insulation should be visible through the crimped barrel. The crimp itself should feel tight around the wire. You should not see any signs of over or under-crimping, such as flattened, deformed, or loose crimps. The insulation should remain undamaged, and no exposed wires or corrosion should be present. Common defects include an improper degree of compression, which can lead to stress relaxation or under/over crimping. Also, look out for contamination or corrosion. Failing to put all wire strands inside the barrel, often due to unclean wire cuts, can also impact connection strength.
Visual inspection is a good start, but testing confirms durability. One standard method is a pull-out test. This involves pulling the wire joint until it breaks, measuring the peak force, and comparing it to minimum pull force tables. This is a destructive test. Non-destructive options include a "pull and return" test, where the terminal is pulled to a specific force and then released, or a "pull and hold" test, where the force is maintained for a period.
For electrical integrity, perform several tests. A continuity and resistance check uses a multimeter to ensure low resistance through the crimp, ideally near zero ohms. Higher resistance indicates a problem. A voltage drop test involves running a significant current through the connection and measuring the voltage across the crimp. A noticeable voltage drop or heat suggests high resistance. In critical applications, thermographic cameras can identify hot spots caused by high-resistance crimps. Multiconductor testers can also provide detailed data for each connection.
Proper care ensures your tools last. Always clean your hydraulic cable crimp tool after each use. This prevents dirt and debris buildup. Neglecting cleaning can lead to corrosion and a shorter lifespan. Store the tool in a designated area. This protects it from environmental damage. Use proper containers to reduce the risk of physical damage. Organized components allow easy access and prevent loss. MARSHINE tools are built for durability, and good storage practices enhance their longevity.
Tip: Insecure storage increases the risk of physical damage. Always secure your tools.
The hydraulic fluid is the lifeblood of your crimp tool. Regularly check its level and condition. The HD120 hydraulic crimp tool, for example, uses biodegradable hydraulic fluid from the factory. This shows the specified type for that tool.
Look for signs of trouble:
Always use high-quality oil and change it according to manufacturer guidelines. Filters help remove impurities.
Crimping dies are critical for good connections. Regularly inspect them for wear or misalignment, especially after extensive use.
Indicators of wear or damage include:
If crimps begin to slip, this is a key indicator that the dies or the entire tool need replacement.
Follow these steps for replacement:
Hydraulic crimping ensures strong, lasting connections. This method guarantees leak-free connections and maintains system integrity. It also enhances performance and offers longevity, saving costs over time. Always use a quality hydraulic cable crimp tool and follow proper procedures for reliable results.
Hydraulic tools deliver superior force and consistent crimps. They create stronger, more reliable connections than manual options. MARSHINE's tools make tough jobs easy and efficient.
MARSHINE tools achieve precise crimps every time. This precision, plus proper inspection and testing, guarantees long-lasting, durable connections. They meet high industry standards.
Yes, MARSHINE's hydraulic tools are very versatile. They use various die sets for many cable and connector types. This includes copper, aluminum, and different lug styles. 🛠️
Tip: Always match the die set to your specific cable and connector for optimal results.


